Discover and buy more than 230,000 products


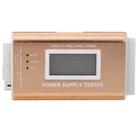

YNS-05 Desktop Computer Power Testing Tool Aluminum Alloy LCD Display ATX Power Tester
Item SYA0026314

Warehouse: CN
Lead time: Item will be ready for ship between 01 Aug and 02 Aug 2025

Description
1. Just connect the ATX connector of the power supply to simply and intuitively know whether the output of each power supply is normal
2 .It is a powerful power supply test equipment that can detect ATX, BTX, ITX, TFX computer power supplies, and can display each group of voltage and PG value on LCD
3. Quickly detect computer power supply convenient instrument
4. The shell is made of aluminum alloy, which is durable and practical
Specifications:
1. Voltage input: 20/40PIN (ATX power supply)
2. Voltage detection: +12V -12V +5V +3.3V 5VSB 12VPG
3. Connection port: Floppy HDD COROM SATA 4pin (P4) 8pin(Dual-CPU) 6pin(PCI-E)
4. Weight: 125g (aluminum alloy shell)
Operation Method:
1: Insert the unloaded power supply 20Pin or 24Pin plug into the corresponding position of the power supply tester. Turn on the power supply, and two "beep" sounds will be heard at the same time. If the values ??of each group are not flashing or alarming, it means that the output power of this power supply is normal. If the corresponding voltage or PG value is displayed as a flashing alarm state, it means that this power supply is a faulty power supply! For test related values, please refer to the following chart
(Tip: If you only plug in the 20Pin or 24Pin interface tester, the screen (+12V2) alarms and displays LL. The LL displayed here is for testing 4P or 6P/8P. If it is not plugged in, you can ignore it. Or just plug in one group)
2. Other large 4P (HDD interface), small 4P (floppy drive interface), 4P/8P (CPU interface), 6P (graphics card interface), SATA interface, these interfaces need to be plugged in when testing. If not testing, you can leave them unplugged
3. Plug in the large 4P (HDD interface), small 4P (floppy drive interface) tester, the +12V and +5V display lights on the left (if the lights are not on, it means that this group of lines is faulty)
4. Plug in 4P/8P (CPU interface), 6P (graphics card interface) test The tester screen (+12V2) displays the test voltage (flashing alarm if there is a fault)
5. When the SATA interface tester is plugged in, the +12V, +5V and +3.3V indicator lights on the left are on (if the lights are off, it means this group of lines is faulty. Some manufacturers power SATA interfaces do not have +3.3V voltage output)
Note: The +3.3V light may not light up when the SATA interface tester is plugged in, because the power SATA interfaces on the market now have 4 or 5 wires. First, confirm whether your power SATA interface has 4 or 5 wires. If it has 4 wires, there is no +3.3V output. Only 5 wires have +3.3V output. When using, try not to hot-plug the 24Pin interface. (Must plug in the 24Pin before powering on).
Related products