Discover and buy more than 230,000 products

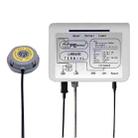
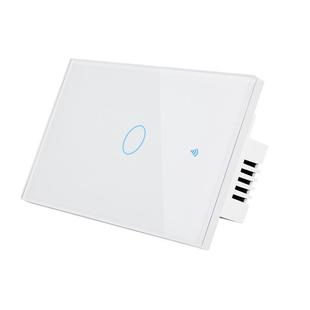
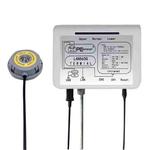
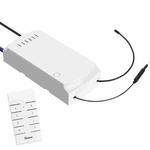
Pcsensor LAN563G-HS10-2 Household Intelligent Network Remote Temperature Monitoring System
Item TBD0421290302

Warehouse: CN
Lead time: None

Description
1. Power supply mode: POE or USB
2. Device power: less than 1.5W
3. Working voltage: 5V
4. Working current: less than 300mA
5. The length of the probe can reach 10 meters
Factory default parameters
1. Username: Pcsensor
2. Password: admin
3. IP: 192.168.1.188
4. Gateway: 192.168.1.1
5. Subnet mask: 255.255.255.0
6. Port: 5200
7. Web page refresh interval: 5 seconds
8. Website URL: http://192.168.1.188:5200 (equipment supports secondary development, please consult sales staff for details)
Product use: If the user is just starting to use the device, please follow the steps below:
1. Access the probe
The device can be connected to 2 probes at the same time (different types of probes can be mixed), there are 3 modes of probes, respectively
1.1.DX probe: Temperature range: -40 to 125 degrees Celsius, accuracy 0.05 degrees Celsius
1.2.TX probe: Temperature range: -40 to 125 degrees Celsius, accuracy 2 degrees Celsius
1.3.HX probe: temperature range: -40 to 125 degrees Celsius, accuracy 0.3 degrees Celsius; humidity range: 0-100%, accuracy 3%
2. Access the network cable
Use a network cable to connect the device to the computer, and modify the network parameters of the computer to: IP: 192.168.1.100 (the last digit is not 188); subnet mask: 255.255.255.0; gateway: 192.168.1.1
3. Plug in USB power
4. Open the software
4.1. After opening the software, it will pop up whether to load historical devices, select No
4.2. Then the Add Device dialog box will pop up, enter the IP and port of the device, the factory default IP is 192.168.1.188, and the port is 5200. Then click OK to add the device
5. Enter the device password: in order to prevent the device from being arbitrarily modified, each device can set a password, the default password is admin
6. Select Mode
Since different devices have different measurement and control modes, the user needs to select the appropriate measurement and control mode, and the user needs to select the normal measurement and control mode, and the mode selection is at the upper left of the software.
7. Start loading data
After adding the device and selecting the mode, click Start on the upper right to read the data; so far, the user has been able to detect the temperature and humidity data normally
8. Modify device parameters: the user needs to add the device to the local network, and needs to modify the network parameters of the device to match the parameters of the local network, click the device information on the upper left, and the setting interface will pop up, where the user can modify: device name, Device password, device gateway, device IP, port, subnet mask, MAC address and other data. After clicking save, the device will automatically restart and run according to the set parameters.
9. Reset the device
If the user has set some parameters or performed some operations and the device cannot be connected, you can press and hold the reset button of the device for more than 5s. At this time, the red, green and blue lights on the device will flash at the same time, indicating that the device is successfully reset and all settings are restored to the factory. status, the user can reset it.
10. Web page function
The user can also operate the device through the web page without installing the software (the device and the computer are required to be in the same local area network).
Open the browser, enter the URL: 192.168.1.188:5200 (factory default parameters, if the user has modified the IP and port, input according to the modified parameters).
11. Remote operation
The device can automatically upload the data to the server, and the user only needs to use the computer software or mobile phone client to realize the remote operation of the device
11.1. Ensure that the network cable connected to the device can be connected to the external network normally
11.2. Confirm that the network parameters of the device are correct; then, add the device that needs to be uploaded to the server into the software;
11.3. At the top right of the software, there is a registration option. Users need to register an account first. After registering the account, log in to the account, and then there will be local network uploading and connecting network devices. Click the local network upload and wait for the device to connect to the server. When the upload is prompted, the user can log in to the same account through any computer or mobile phone that can access the Internet, and then click to connect to the network device, the software will automatically load the device under the account name, so that the user can remotely operate the device.
Related products